Showing posts with label Mysql. Show all posts

Creating A Task List Using Craft Console


Creating A To-Do List:

Our previous article was on "Travis CI: Continuous Integration for PHP Project". A very happy new year. It is this year's first tutorial for appsntech.com readers. In this article I will discuss How To Create A Simple To Do List Using Craft Console (Cygnite Component). In this tutorial we will be using Cygnite PHP Framework v2.x.

I am not going to explain how to install cygnite framework & configure database connections, as it is already explained in its beautiful documentation. Cygnite directory structure explained here.

What is Craft Console?

Craft introduced in Cygnite v2.0. Craft is console based powerful code generator provided by Cygnite Framework. It is built on top of Symfony console component.

It helps you to create and generate fully customized Controllers, Models, Forms, Migrations, Commands, CRUD for database and more. To access craft in Cygnite, just go to:


cd /var/www/cygnite/console/bin/

Execute below command to see list of available commands for your application.


php craft list

To demonstrate, I will use Craft for building our simple To-Do list. Let's get started.

Creating a Table For To-Do List:

Configuration of database connection explained here. Once you have configured database connection. Let us create a new table for our "To-Do app".

Meet Migration & Schema Builder:

Before doing anything else we need to build a table schema. Cygnite has a Schema Builder to help you building table schema and Migrations class to build create database version control.

All though you can create a table schema executing query. But recommended way to build table schema is using Migrations . Execute below command to generate your migration file.


php craft migrate:init to_do

Go to /src/Apps/Resources/Database/Migrations/ directory and find out the file with name xxxx_to_do.php. Edit the file add below lines of code inside "up" method .


//Your schema to migrate
Schema::make('to_do', function ($schema)
{
    $schema->create([
            ['column'=> 'id', 'type' => 'int', 'length' => 11,
             'increment' => true, 'key' => 'primary'],
            ['column'=> 'title', 'type' => 'string', 'length' =>100],
            ['column'=> 'description', 'type' => 'string', 
             'length'  =>16],
            
            /*..Add columns to your table schema .*/
            ['column'=> 'created_at', 'type' => 'datetime', 
             'length' => 'null'],
            ['column'=> 'due_date', 'type' => 'datetime', 
             'length' => 'null'],

    ], 'InnoDB', 'latin1');
});


Execute below command to create table schema.


php craft migrate

You will see the below message in your console:

Now your "to_do" table is ready to store some tasks.

Generating CRUD Using Craft:

You don't have to do much stuff as Craft commands are ready to generate most of the stuffs for you. Open the console window and from the root directory of your project, go to /var/www/cygnite/console/bin/ directory and issue below command.


php craft generate:crud todo to_do

Your to do manager is ready, let us add a single route to the controller to test the newly created app by executing CRUD operations.

Open /var/www/cygnite/src/Apps/Routing/RouteCollection.php, add a route as below in the executeStaticRoutes() method.


$this->routesController->controller('Todo');

Go to the url: http://localhost/cygnite/todo/ You will see below screen.

This page will display empty records in the grid as we didn't add any to do tasks.

Creating And Updating the To-Do List

Let us add a new tasks by clicking Add Todo button. You will land to below form. Now let us add a new to-do task using this form.

Once you added a new to do task you will be redirected to task list page.

Now let's say added to do task needs to be updated. Click Edit button in the grid, it will take you to edit form.

Click on save button once you updated the Todo, it will update the todo list and redirect you to list page. You will see screen as below.

Liked this? Read these!

  1. Get Started With Test Driven Development: Unit Testing With PHPUnit?
  2. Backbone JS vs Angular JS- Uncovering key differences
  3. 5 Best Things You Must Know About PHP7
  4. Facebook wallscript - Facebook style wall posting using Cygnite PHP Framework, Jquery, Ajax

Wrapping Up:

I have explained you how to create a simple To-Do list using Cygnite Framework. That’s all for this tutorial. Isn't easy? This is just a basic tutorial. You can do much more. So now it’s your turn, give it a try. Use Cygnite framework, save time. You will be up and running fast.

Hope you like this tutorial and many more useful posts to publish for this year. If you have any questions, please let us know by posting your comments below. Please don't forget to share or like this article with your friends. Thanks for reading.

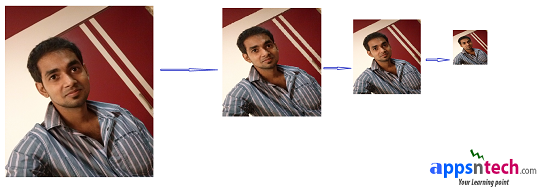
Facebook style profile photo upload + Resize Image + Saving into database


Introduction:

My last article was “How to build Facebook style profile photo upload using PHP + JQuery + Ajax Part1”. . This is continuation of my last article, last tutorial I show you how to upload profile picture using jquery, ajax, in this tutorial I will show you how to create thumbnail to fit the profile picture and saving into database.

Profile Picture Upload and Thumbnail Creation:

To achieve this I am using Cygnite PHP framework, if you had built application already, would like to use tiny component rather than using entire framework, you can use standalone Cygnite File component for image uploading and creating thumbnail image.


In previous tutorial we already created controller, view and js files. Open apps/controllers/ProfileController.php, import namespace to include thumbnail component, and add below code after uploading the file upload success to generate thumbnail image. I am adding piece of code to upload, creating thumbnail image and saving into database below, you can update below code into our ProfileController.php uploadAction() as discussed in the part1 tutorial.


use Apps\Models\Profile;
use Cygnite\Common\File\Thumbnail\Image; // available in dev-master 
use Apps\Components\Thumbnail\Image; //available in v1.2.4


$status = Upload::process(function($upload)
{
    $upload->file = 'document'; // Your file input element name
    $upload->ext = array("JPG", "PNG"); // Add validation for image upload
    //$upload->size = '6144';// limit the size

    if  (isset($_FILES['document']))  {

        $fileArray = array();
        $fileArray = pathinfo($_FILES['document']['name']);

        if ($upload->save(array("destination"=> "upload",  "fileName"=>$fileArray['filename'])) ) {

            // Create thumbnail object
            $thumb = new Image();
            $thumb->setRootDir(CYGNITE_BASE);
            $thumb->directory = 'upload/'.$_FILES['document']['name'];
            $thumb->fixedWidth = 100;
            $thumb->fixedHeight = 100;
            $thumb->thumbPath = 'upload/thumbnail/';
            $thumb->thumbName = $fileArray['filename'];

            if ( $thumb->resize() ) {

                // Save profile information into database
                 $profile = new Profile();
                 $profile->name = 'Sanjoy Dey';
                 $profile->original_image_path = CYGNITE_BASE.'upload/';
                 $profile->image = $_FILES['document']['name'];
                 $profile->thumbnail_image_path = CYGNITE_BASE.'upload/thumbnail/';
                 $profile->save();
            }

            $response= array('status' => true, 'msg' => 'Profile Picture Uploaded Successfully!' );
        } else {
            $response = array('status' => false, 'msg' => implode(', \n', $upload->getError()) );
        }
        header('Content-type: application/json');
        return  json_encode($response);
    }
});

echo $status ;


We are storing the thumbnail image into /cygnite/upload/thumbnail/ directory and saving into table 'profile'.

We will save the thumbnail image path and original image path into database as above. let me assume you have already set database connection into apps/configs/database.php

If you are building session based application. You can simply check user session id to identify user profile image and display it.

Using Standalone Cygnite File Thumbnail Component for creating thumbnail image:

If you are using standalone file thumbnail component to create thumbnail image (Discussed in previous post) than install file component from composer repository and below code to resize.


 require 'vendor/autoload.php';

 use Cygnite\Common\File\Thumbnail\Image;


 $thumb = new Image();
 $thumb->setRootDir(getcwd());
 $thumb->directory = getcwd().'/upload/profile-picture.jpg';// your dynamic image path
 $thumb->fixedWidth = 100;
 $thumb->fixedHeight = 100;
 $thumb->thumbPath = 'upload/thumbnail/';
 $thumb->thumbName = 'profile_thumbnail_image';
        
 if ( $thumb->resize() ) {
    // success
 }


Conclusion:

Hope you found this article helpful. If you are interested to write tutorial for us please post me. Please don’t forget to like, share with friends, or leave your comments below.

Keep visiting for upcoming article. Have a nice day.

Facebook Style Autocomplete Using Angular JS + PHP + MYSQL + Bootstrap


Introduction:

Hello guys, in my last article we have explained to "Generate CRUD application within 2 min". Today I am going to discuss "How to make a Facebook style Autocomplete utilizing Angular JS, Cygnite PHP, Mysql and Bootstrap template”. Angular JS is awesome front end framework by Google used to build interactive web UI. Angular allow you to build clean structured, maintainable front end applications. This tutorial will help you to learn how to make autocomplete textbox using Angular JS, PHP, MySql, Bootstrap theme etc.

To achieve this we will also use Bootstrap UI with Angular JS. To save our time from writing queries and build clean MVC architecture we are also using Cygnite PHP Framework. You may use core php and mysql functions.

After downloading and installing composer we are ready to set-up Cygnite into our local machine and configure database etc. to get started with our next project.

Step 1:

First download the Cygnite either using composer or manually from GITHUB repository. You may also follow video tutorial to setup Cygnite into local system.

You may be interested to read Building A Simple Product Management App Using Angular JS + Cygnite PHP + Bootstrap

Step 2:

Download Angular JS, ui-bootstrap.js and paste into /assets/js/angular/ path. Create a view page called autocomplete.view.php into the apps/views/angular/ directory. Paste below code into your view page.


<!DOCTYPE html>
<?php
use Cygnite\AssetManager\Asset;
use Cygnite\Common\UrlManager\Url;
use Cygnite\AssetManager\AssetCollection;

$asset =  AssetCollection::make(function($asset)
{
  $asset->add('style', array('path' => 'assets/css/angular/bootstrap.min.css', 'media' => '', 'title' => ''))                
    /* ->add('script', array('path' => 'assets/js/cygnite/jquery.js'))
     ->add('script', array('path' => 'assets/js/angular/angular.min.js'))*/
     ->add('script', array('path' => 'assets/js/angular/ui-bootstrap.js'))
     ->add('script', array('path' => 'assets/js/angular/app.js'));
			
  return $asset;
});
?>
<html ng-app="MyTutorialApp">
<head>
<title>Facebook Style Autocomplete Using AngularJS + PHP + MySQL</title>
	
<?php $asset->dump('style');// Style block ?>
<link href="http://fonts.googleapis.com/css?family=Open+Sans:400,600,300,700" rel="stylesheet" type="text/css"> </link>
<link rel="shortcut icon" href="<?php echo Url::getBase(); ?>assets/img/cygnite/fevicon.png" > </link>

 </head>
 <body>
	
 <input type="hidden" id="baseUrl" value="<?php echo Url::getBase(); ?>"/>
    
 <div class="navbar navbar-default" id="navbar">
 <div class="container" id="navbar-container">
 <div class="navbar-header">
 <a href="#" class="navbar-brand">
 <small>
 <i class="glyphicon glyphicon glyphicon-log-out"></i>
   Angular JS Demo
 </small>
 </a><!-- Brand -->
		
</div><!-- /.navbar-header -->

	<div class="navbar-header pull-right" role="navigation">
        <a href="http://www.appsntech.com/2014/11/facebook-style-autocomplete-using-angular-js-php.html" class="btn btn-sm btn-default nav-button-margin"> <i class="glyphicon glyphicon-book"></i>&nbsp;Tutorial Link</a>
        <a href="https://app.box.com/s/yqyq0toxuo5n7ton0vol" class="btn btn-sm btn-success nav-button-margin"> <i class="glyphicon glyphicon-download"></i>&nbsp;Download Project</a>
	</div>
	</div>
	</div>
<div class="row">
	<div class="container">
	 <div class="col-sm-9"> 
	  <div>
	 <!-- Bind the country into the template -->
	<script type="text/ng-template" id="autocomplete-template">
        <a>
        <span bind-html-unsafe="match.label | typeaheadHighlight:query"></span>
	<i>({{match.model.country_name}})</i>
        </a>
	</script>

	<blockquote><h1><a href="http://www.appsntech.com/2014/11/facebook-style-autocomplete-using-angular-js-php.html">Facebook Style Autocomplete Using AngularJS + PHP + MySQL</a></h1></blockquote>

	<form class="form-search" ng-controller="angularAutocompleteController">
	Selected Country: {{selectedCountries.country_name}}
	<br>
	<!-- Typehead to input field-->
	<input type="text" ng-model="selectedCountries" auto-complete ui-items="countries"   
	placeholder="Search Countries" typeahead="c as c.country_name for c in countries | filter:$viewValue | limitTo:10" 
	typeahead-min-length='1' 
	typeahead-on-select='onSelectPart($item, $model, $label)' 
	typeahead-template-url="autocomplete-template" 
	class="form-control" style="width:350px;">
							
       <i class="icon-search nav-search-icon"></i>
      </form>
     </div>				
    </div>    	
   </div>
</div>
    
<script src="//ajax.googleapis.com/ajax/libs/jquery/2.1.1/jquery.min.js"></script>
<script src="//ajax.googleapis.com/ajax/libs/angularjs/1.3.2/angular.min.js"></script>

 <?php
 //Script block. Scripts will render here
 $asset->dump('script');
 ?>
<style type="text/css">
.navbar{border-radius: 0;background: #438EB9;color: #fff;}
.navbar .navbar-brand {color: #FFF;font-size: 24px;text-shadow: none;}	
</style>	
    </body>
</html>


We are binding the typehead into the input field.

Step 3:

Create a model class called Country.php into apps/models/Country.php and paste below code.


namespace Apps\Models;

use Cygnite\Database\Schema;
use Cygnite\Foundation\Application;
use Cygnite\Common\UrlManager\Url;
use Cygnite\Database\ActiveRecord;

class Country extends ActiveRecord
{

    //your database connection name
    protected $database = 'tutorials';

    // your table name here (Optional)
    protected $tableName = 'countries';

    protected $primaryKey = 'id';

    public function __construct()
    {
        parent::__construct();
    }
}// End of the ShoppingProducts Model

Step 4:

Configure database connection into your apps/configs/database.php. Than Create a controller called AngularController.php inside your apps/controllers/ directory and paste below code.


namespace Apps\Controllers;

use Cygnite\Foundation\Application;
use Cygnite\Mvc\Controller\AbstractBaseController;
use Apps\Models\Country;

class AngularController extends AbstractBaseController
{
    protected $templateEngine = false;
     /*
     * Your constructor.
     * @access public
     *
     */
    public function __construct()
    {
        parent::__construct();
    }
    /**
     * Default method for your controller. Render welcome page to user.
     * @access public
     *
     */
   public function indexAction()
   {    
        $this->render('autocomplete');//Render view page
   }
   
   public function countryListAction()
   {
      $countryList = array();
      $country = new Country();
      $countryList = $country->select("*")->findAll('ASSOC');
  
       if (count($countryList) > 0 ) {
    # JSON-encode the response
    echo  json_encode($countryList);
       }
   }

}//End of your controller


Step 5:

Create a table called “countries” and import countries.sql from here.

Step 6:

Now create a js inside your /assets/js/angular/app.js and paste below code. In this file we will inject bootstrap ui module and use ajax to fetch countries from the database and we will bind the countries into the input field.


var app = angular.module('MyTutorialApp',  ['ui.bootstrap']);

app.controller('angularAutocompleteController', function($scope, $http) {

var baseUrl = $("#baseUrl").val();
 
 getCountryList(); // Load all countries with capitals
  
  function getCountryList(){  
  
  $http.get(baseUrl+"angular/country-list").success(function(data){
      
        $scope.countries = data; // set the data into the countries
  
    });
    
  };
  
});


Step 7:

Go to browser and enter the url http://localhost/cygnite/angular/ type the country name and you will see countries are populating into the textbox.

Conclusion:

We sincerely hope you found this article helpful. I will write more about angular coming days. If you would like to see specific you can also request tutorial. Please don't forget to like, share with friends, or leave your comments below.

Keep visiting for upcoming articles. Have a nice day.

Auto reload page content every 3 sec using JQuery, Ajax & PHP


Hello Friends!

Did you read my last blog “How to auto resize textarea based on the user input?”

If you have noticed that the Facebook/Twitter social networking sites repetitively search for new comments/tweets to display to the end user. It is pretty simple concept, which we can achieve using a simple script. It is approx. 10 lines of code. 

I thought this may be helpful for newbie and here I am going to write about "How to auto reload partial page and display number of tweets" with very few steps.

Step 1:

Create a index.php file and paste below code into it. Don't forget to include Jquery and Ajax framework in your page.


  $(document).ready(function(){ 
   var auto= $('#tweets'), refreshed_content;	
       refreshed_content = setInterval(function(){
        auto.fadeOut('slow')
            .load("result.php?id=123").fadeIn("slow");
            }, 3000); 										
    console.log(refreshed_content);										 
    return false; 
  });
  

Above script will call result.php page on every 3 seconds and fetch the number of tweet count. Replace id=123 with logged in user id. Next we are going to place a div where tweets count will get displayed. 


<div class=”container”>
<div id="tweets"> </div> 
</div>

Now let us create result.php to perform twitter live search and return the tweet count to the user. Copy  below piece of code and paste it into result.php to perform live database search. Here user_id is referred to the logged in user id to search against the database.


$userid = (string) (isset($_GET['id'])) ? $_GET['id'] : '';

$link = mysql_connect("localhost", "root", "");
mysql_select_db("twitter", $link);
$sql = "Select * FROM user_tweets where user_id = '$userId' ";
$result = mysql_query($sql, $link);
$num_rows = mysql_num_rows($result);

echo "Total $num_rows new Tweets ";exit;


That’s it. We are done. 

This small script will automatically fetch the number of tweets on regular interval and display to end user. You may modified this script accordingly to create a live notification system. 

Hope it will be helpful. Please do not forget to leave your comment below & share with friends.


SOAP web service using PHP + Mysql


Introduction:

This post for people those who are facing trouble with my last article “How to create SOAP service?”. These days web service is playing vital role in most of the web or mobile based application, where cross platform application used to connect and share data using web service. I will explain with some simple steps to do this stuff.

Download


Step 1:

Create a server page called soap_server.php into http://localhost/soapserver/. Paste the below code into the soap_server.php file.


// nosoap.php library file inside your lib/ directory
require_once('lib/nusoap.php');

$server = new nusoap_server;

/*
$server->configureWSDL('server', 'urn:server');
$server->wsdl->schemaTargetNamespace = 'urn:server';
$server->register('mypollServer', 
  array('value' => 'xsd:string'), array(
        'return' => 'xsd:string'), 'urn:server', 
        'urn:server#mypollServer
'
  );
*/

//register a function that works on server
 $server->register('getInfo');

 // create age calculation function
 function find_age($birthday)
 { 
    list($byear, $bmonth, $bday) = explode('-', $birthday);
   list($cyear, $cmonth, $cday) = explode('-', date('Y-m-d'));
 
   $cday -= $bday;
   $cmonth -= $bmonth;
   $cyear -= $byear;
 
   if($cday < 0)
   $cmonth--;
   if($cmonth < 0)
   $cyear--;
 
   return $cyear;
 }

 // create the function 
 function getInfo($name, $birthday)
 {
    $result['status'] = true;

    if(!$name){
      return new soap_fault('Client','','SANJAY!');
    }


    // Return if you want only very few server response else delete this line.
    //return $result = array('name'=> $name,'age'=> find_age($birthday) );


    $conn = mysql_connect('localhost','root','');
    mysql_select_db('webservice', $conn);

    $sql = "SELECT * FROM books";
    $q = mysql_query($sql);

    $result = array();

    while($row = mysql_fetch_array($q)) {

       $result[] = array(
                    'cd'=>$row['cd'],
                    'title'=>$row['title'],
                    'author'=>$row['author'],
                    'publisher'=>$row['publisher']
        );

    }

   return $result;
 }

$HTTP_RAW_POST_DATA = isset($HTTP_RAW_POST_DATA) ? $HTTP_RAW_POST_DATA : '';
$server ->service($HTTP_RAW_POST_DATA);
exit();


Step 2:

Now let us create a page called soap_client.php and paste below code to call soap server.


require_once('lib/nusoap.php');
header('Content-type: text/html');

$client = new nusoap_client('http://localhost/soapserver/soap_server.php');
$err = $client->getError();

if ($err) {
 echo '

Constructor error

' . $err . '

';exit; } $param = array( 'name' => 'Sanjoy Dey','birthday'=>'1987-12-20'); $response = $client->call('getInfo',$param); var_dump($response); if($client->fault) { echo "FAULT: Code: (".$client->faultcode.") "; echo "String: ".$client->faultstring; } else { echo $response['name']."\n Age: ".$response['age']."'s"; } echo '<h2> Request</h2> <>' . htmlspecialchars($client-&gt;request, ENT_QUOTES) . '</br> '; echo '<h2> Response</h2> <br>' . htmlspecialchars($client-&gt;response, ENT_QUOTES) . '</br> '; //echo '<h2>Debug</h2><br>' . htmlspecialchars($client-&gt;debug_str, ENT_QUOTES) . '</br>';

Step 3:

Go to browser and run http://localhost/soapserver/soap_client.php file. You will Soap Response as "Name" and "Date of Birth".

Conclusion:

This small post help you to create basic SOAP web service using PHP and nusoap.php library. Hope this post helps to solve displaying blank page. Keep visiting and stay updated. You can also join our technical groups by clicking below links.

Good Luck!

Follow Us On Facebook Open Source Web Developers by Appsntech facebook group Twitter Open Source Web Developers by Appsntech twitter group Google+ Open Source Web Developers by Appsntech Google group Linkedin Open Source Web Developers by Appsntech, LinkedIn group
Copyright @2011-2015 appsntech.com. All rights reserved.